Showing posts with label freehand roses. Show all posts

Saturday, 30 August 2014

Renaissance Cosmetics Guest Post - Victorian Roses

Hi Goddesses


Earlier this week, I was the guest post for Renaissance Cosmetics, which is the brand owned by Meghan of Willpaintnailsforfood.  She is one of THE most talented bloggers out there, and now she's diversified into making polish, and a bloody good job she's done there too!

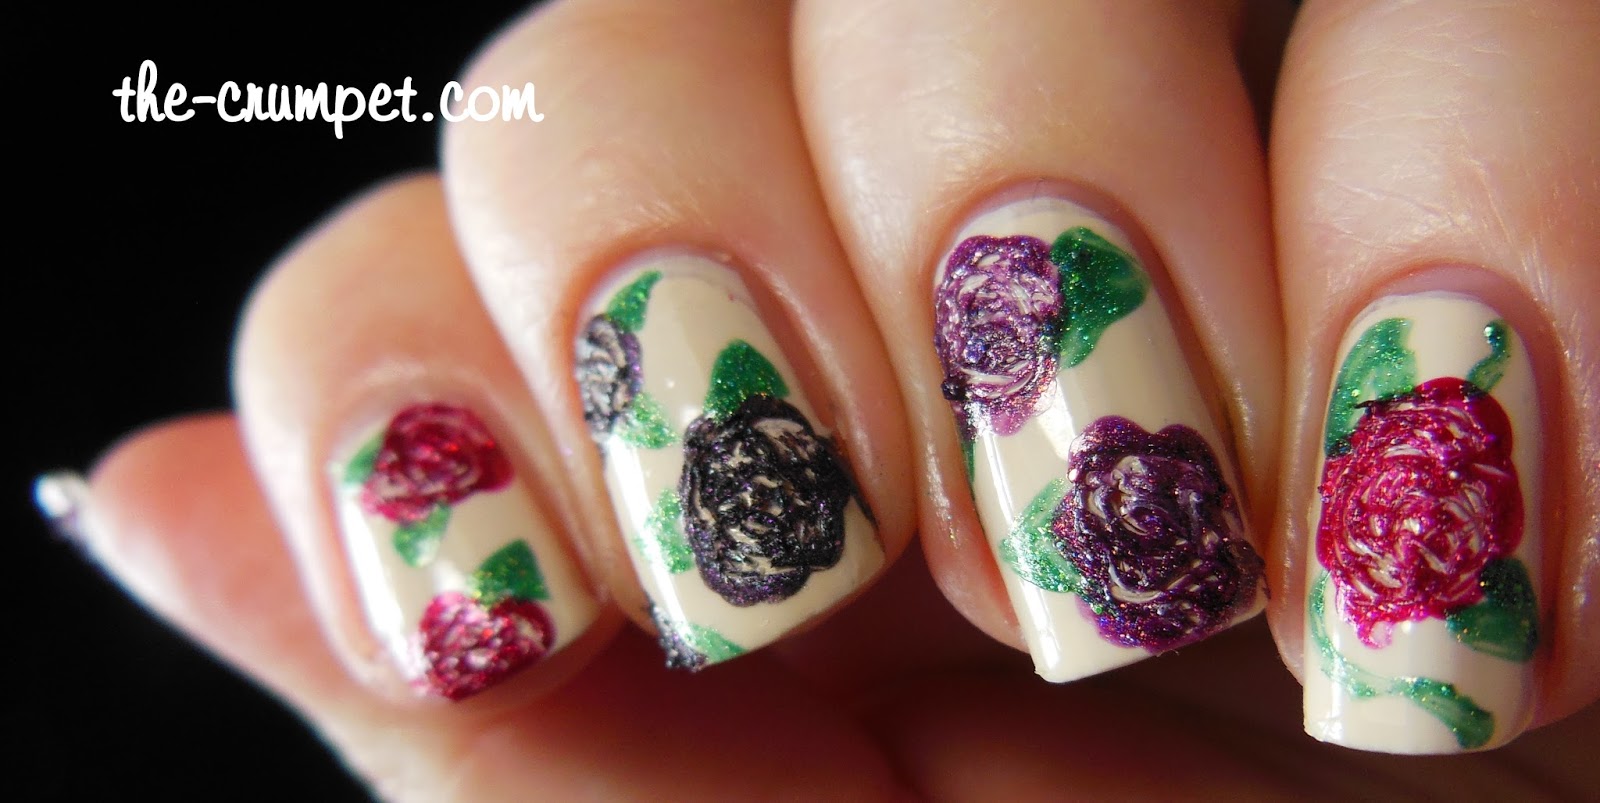


Meghan sent me 4 polishes for review, and next week, you can see all of these individually on my blog, but for today, we have some nail art featuring all 4.


Let's look at the polishes first -
index finger - Rosie-Osie
middle finger - The Danforth
ring finger - Flirt
and the green is Emerald Envy


When I chose these colours, I immediately saw roses in my head, and what gorgeous semi-gothic, Victorian roses they made!   I used Meghan's favourite polish on base - OPI My Vampire Is Buff.


These polishes are intensely rich in colour and all of them are one coaters.  Although I wouldn't usually do this kind of nail art with glitters, they lent themselves admirably to the task.


I did my roses differently this time.  I've just bought the Sam Biddle needle pen, and did some scribbling with the pen to create the petal effect.


These polishes were sent to me for an honest review.  You can buy them - and the fabulous new collection - HERE.


Saturday, 3 August 2013

How To ... Freehand Roses - Tutorial for International Nail Art Day

Hi Goddesses


Today is International Nail Art Day - how cool is that?  Loads of bloggers are taking part, and you can join in too.  Second thought - there's a nail art day but there's still no Crumpet Day?  How wrong is that!


Lol.  This last week on the blog has been dominated by my entry for this year's piCture pOlish BlogFest.    And what did almost all of those posts have in common?  Roses.  And that's what today's How To is all about.


Now, before we start, can I just say - these are mega easy!  I was intimidated for months, but seriously, there is no need to be.  They may look difficult, but they really are not, and trust me, once you start, you will not be able to stop lol!


Things You Will Need
* a base polish
* a colour for your roses, and a colour for your petals.  The petal colour should be a couple of tones lighter or darker than your rose colour.  In this tutorial, I mixed my colours for my petals, but usually, I don't do that, so please don't feel it has to be that complicated
* a colour for your petals.  Again, I have mixed my colours, but that's only because I have used what I used for the piCture pOlish roses.  Usually I use a dark green acrylic paint.  Polishwise, any dark or medium green will work.
* a large dotting tool
* a small nail art brush or thin dotting tool
* a blobbing mat
* top coat
* clean up materials


Ready?

Step 1


Paint your nail with your base colour.  I have used a white.


Step 2


With your large dotting tool, create the outline of your rose.  The dotting tool really helps you here.  You are trying to create a lumpy circle, so take advantage of the irregular edges the dotter will give you.  NOTE - you are not dotting your rose on, you are using the tool to draw an outline, the way you would with a brush.  The trick is to really get a good blob on that dotting tool!


Step 3


Colour in your rose.


Step 4


Add your petals.  Because the piCture pOlish challenge was about only using 3 colours, I mixed Beige and Wisteria to create my petal colour.


With a thin nail art brush or thin dotting tool, create your first 2 strokes.  I create a shape that's a bit like an apostrophe and a comma - they sit side by side, sort of interlock, but don't touch.


Step 5


Create the rest of your petals.   Just go round, adding extra loops.  Irregularity works well.  As you move out from the centre of the rose, try to create your petal out of line with the previous row of petals, so that they don't all stack up in neat rows.


Step 6


Add your leaves, first with a triangle shape.


Usually, you would just use a green paint or polish here.  Again, to comply with the pp rules, I mixed Wisteria and Honeydew.


Step 7


Colour in your leaves.


Step 8


Add top coat.


See, not difficult at all, is it ?  Create random blob shaped things?  We can do that!  Draw commas and apostrophes?  We can do that too!   It's the petals that intimidated me, but really, easy as peasy :)


Quick recap - and enjoy!  xx


Related Posts Plugin for WordPress, Blogger...
Blogging tips