Wednesday 31 July 2013

Dollish Polish Swatch-a-Rama

Hi Goddesses


One of my favourite indie brands is Dollish Polish, it was the first one I really went crazy on, and as a result, I've had quite a lot of swatches lurking, good news, yes?  Noooo, bad news is that a lot of them have lurked for a year, so be prepared for bad lighting, nasty cuticles and rogue clean up!


First up we have GTL - Gym, Tan, Laundry - a lovely pale blue speckled polish.


The eye is drawn to the peach and steel-blue glitters, but it's the shimmer that really makes this polish a winner.


Sweet Dream Are Made of Glitter was bought in the hope a green would like me!  It's a lovely minty confection, sprinkled with small glitters.


As with a lot of these polishes, it's the glitter combination that makes or breaks it, and the purple in this definitely works, but this wasn't a total winner for me.


Next up we have the infamous Toxic Avenger.   This is a genius of a polish, but we just didn't "get" each other.


This is a metallic rainbow in a bottle - multi-chrome, holographic - you name, this has got it going on.


This is one of those polishes that really kills me - I wish they looked better on me :(


And finally the sadness that is Vampire's Coven.   This was my standout from last year's Hallowe'en Collection, but man it looks rubbish on me.


In all the photos I saw, this had a blackISH base, and I was just gutted when I got this on the nail and all the magic seemed to disappear.  Oh well, you can't win em all!


That said, Dolly makes amazing polishes, and caters for a wide indie-loving spectrum.  Her formula is always spot on, and her customer service is great.


Enjoy xx :)

piCture pOlish - Take 3 - Polka Dots

Hi Goddesses


And welcome to another chapter in the saga of piCture pOlish BlogFest lol.  Today's post is some really unsuccessful polka dots I did :(


Polka dots, I think, are the most popular nail art style out there.  Post them on a blog, or pinterest, and everything goes ker-AY-zeeee.  They're cheerful, easy to do, and just look effortless, so where did this one go wrong?


Well, not in the colours.  The 3 colours provided the perfect colour scheme, and whilst the dots may have popped more with brighter colours, the odds WERE in their favour for this mani.


The struggle comes with the size of the biggest dot, and this is where these amazing polishes (possibly combined with the heat) failed.   I just couldn't get a big enough blob on my largest dotting tool, which then makes the pattern kind of .... well, puny.


The PP polishes are great, don't get me wrong, but they are rather thick.  Usually, when you pull the wand out of the bottle, a nice big juicy drip falls off the brush, but that was not my experience here.  This made it difficult to create a good sized blob on my blobbing mat, plus the heat and my fan dried said blob really quickly (would have REALLY helped if I were doing a sugar spun mani though lol).


So, disappointed.  Dots should have worked so well, but didn't.  Hey ho.   Tomorrow, we have The War of The Roses, and the nub of all my BlogFest pain.


Enjoy xx :)

Tuesday 30 July 2013

more piCture pOlish - Swirls

Hi Goddesses


So how did you find yesterday?  I hope you loved BLOGFEST as much as I did, and got a major kick out of seeing 130 of the world's best nail bloggers (and me) do some kick ass tutorials!  So much awesome on display!


Remember, if you want a Crumpet polish in the world, you need to vote for me within the next 12 hours by going HERE.  You also get the chance to win some piCture pOlishes :)


So, I mentioned yesterday that my piCture pOlish journey had not been an easy one.  That was mainly because I did a killer mani and then realised I'd broken the rules, and couldn't use it (you'll get to see it later in the week).  After that, NOTHING compared, and everything just lacked something.  Truth be told, I'm not overly in love with my finished BlogFest mani, although I do like its overall tone and colour scheme.


So this was Alternate #1 - Swirls.  This used the same technique I used a couple of weeks ago, that I originally saw on Fierce MakeUp and Nails.


I couldn't decided whether I loved this or hated it, and neither could everybody else I showed it to!  It got strong reactions, which is good, but ultimately, I don't know ... ultimately it didn't wow me.


By the way - does it look a little like a choc mint mousse to you?


Tomorrow we go polka-dotty!

Enjoy - and don't forget to vote ;) xx

Monday 29 July 2013

piCture pOlish Blog Fest 2013 - Celebrating The Year of The Blogger

Hi Goddesses


Today is an awesome day in the blogging world.  For the past month, a host of bloggers have been in possession of 3 piCture pOlish shades and the following mission - create some nail art using these 3 colours AND create a tutorial.   For any nail art fan, that is amazing news, so enjoy all the tutorials you're going to see today.  Oh and as piCture pOlish will be picking the next 3 bloggers to make Collaboration shades with, there may also be voting involved!


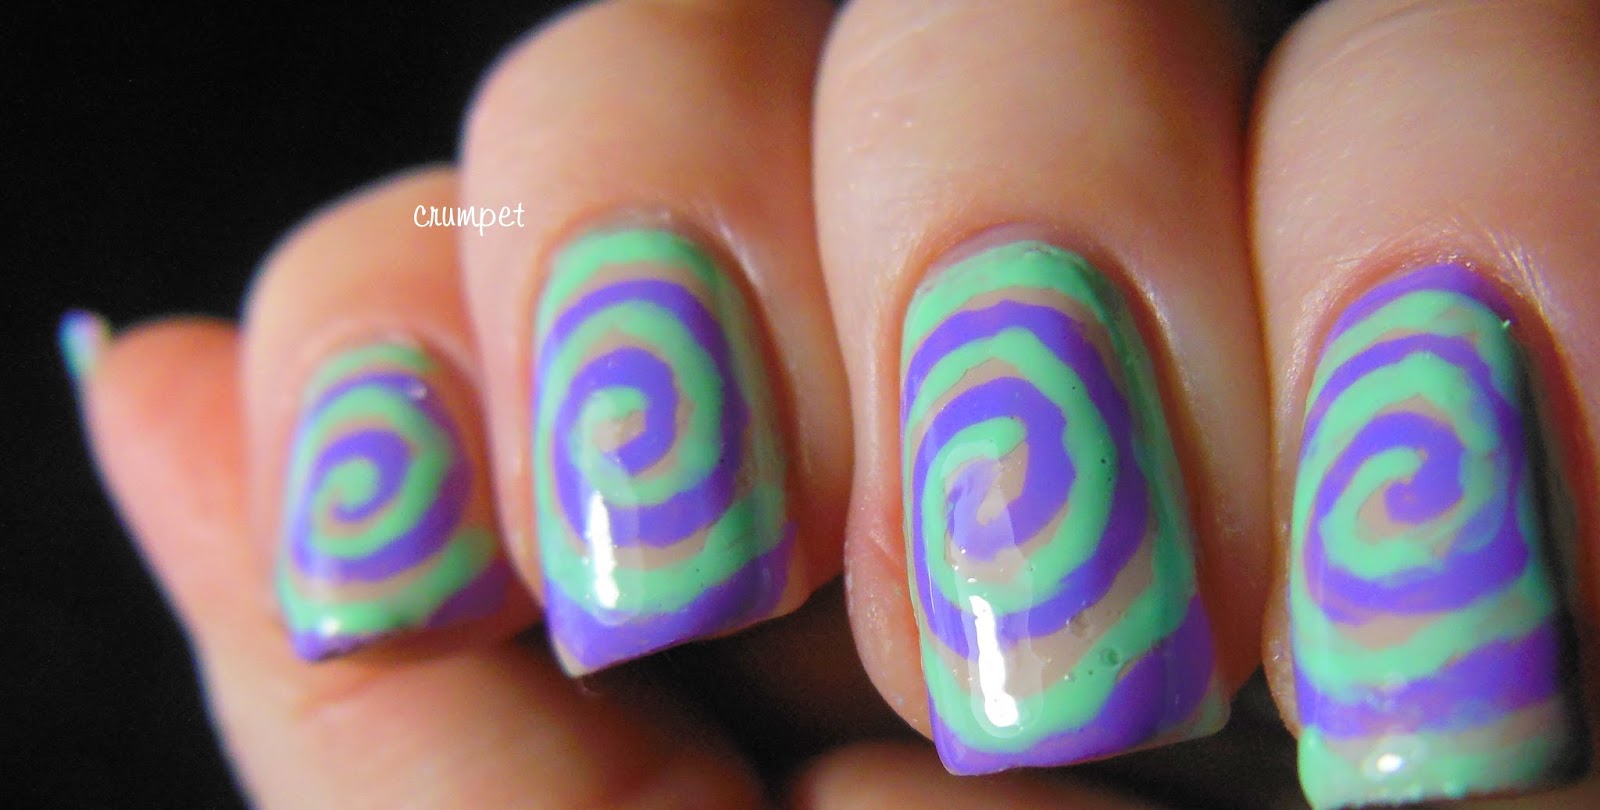
I was sent Beige, Wisteria and Honeydew to play with, and I think I did really well combowise as the colours play nicely together.  However, I've had the journey from hell to get to today's mani and you'll see that unfold over the week.  Let's just say that you're going to be treated to these 3 colours every day this week lol.


What I came up with is a spin on the reciprocal gradient, which you've seen on the blog a couple of times, and which was first created by Emma at Globe and Nail.   When I did my last one, someone commented that it would be interesting to see how it worked with 3 colours ... and that's what we have here.


I really like the subtlety of the striped nails here, and a lot of the credit for that has to go to Beige, which is just so deliciously creamy.  Also, I think you have to be pretty careful on your colour choice if you're going to use 3.


Ready to see how this was put together?  Today I'm just going to show you how to the reciprocal gradient - I'll run you through the rose pattern later in the week.


Tools
- 3 polishes
- sponge
-thin striping tape
- scissors
- tweezers


Step 1


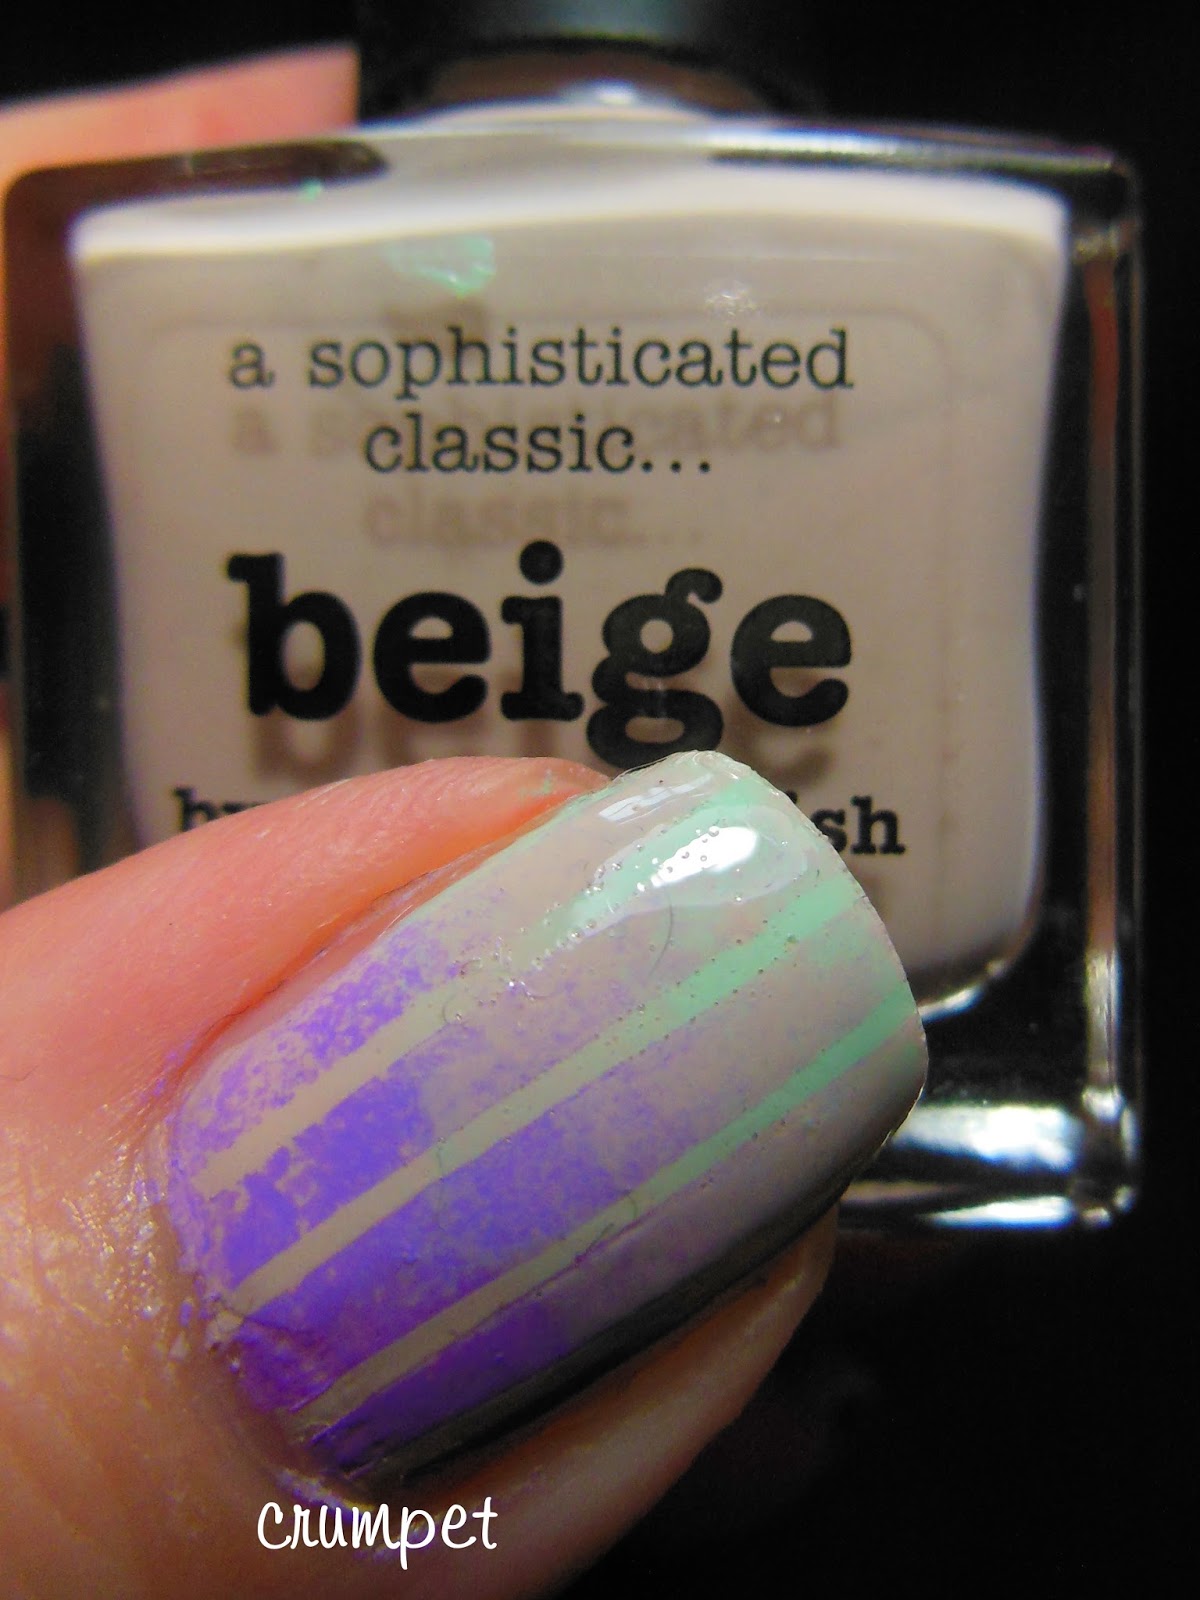
Paint your nails with your base colour.  I used 3 coats of Beige for opacity.


Step 2


Once this is dry, apply your gradient.
When I did my hand, I used a blobbing mat for this part, but for the tutorial, it was easier to paint the sponge.  Either method will work.


TIP - when I do my gradients, I apply it once, and then go back and do it again with a loose bouncy hand.  You want the sponge to bounce on and off your nail to get the full blend effect.


Step 3


Wait for your nails to be completely dry before you start this step.

We're now going to apply my tape.  My preferred method is to cut all my tape first.  I have long strands of it hanging off the desk, which I then apply to my nail.  I usually get 3 nail lengths out of each long strip.

You want to press the tape down firmly, and leave a free edge for when we come to take it off.


Step 4


Apply your reciprocal gradient.

If you were doing the "normal" reciprocal gradient, you just use your original 2 colours at this point, but reversed.  As I was adding in a 3rd colour, all I had to do was make sure that the 1 common colour (Beige) was at the opposite end of the sponge to the first time.


Again, apply your sponge with bounce!


Now, because the Beige was less opaque than the Honeydew, I had to revert to cheating here.  To get the opacity of the Beige that I needed, I ended up painting it directly onto the nail, bouncing, painting, and bouncing, until I had the desired opacity.   Often when I am doing a gradient, I will paint and bounce the tip, to make sure I have the highest colour saturation possible.


Step 5


Ok, so now we're ready to take off our tape.

TIPS - steady hand, steady motion.  I always pull towards me.  And thanks to The Nailasaurus, I always use tweezers - I find it gives a crisper pull.


My tweezers are nothing special but they do have sharp tips - they came free with a pack of sequins, and I use them for tape and for applying bling.


Step 6


Keep stripping!


Step 7


Top coat - I always use Poshe.

What I find really interesting with gradients is how much the top coat smooths the colour.  It really works here, but if you don't like that effect, leave it uncoated, or apply a matte TC.


So there you have it.  NOW, the important stuff.  There is a competion, and the winner gets to make a polish with piCture pOlish.  Do I need to tell you how exciting a Crumpet polish would be??


There are 3 awards that will be voted and chosen as follows via the piCture pOlish special Pinterest Blog Fest 2013 board :
1 x Award - as voted by PP friends and fans
1 x Award  - as voted by the participants of Blog Fest 2013

1 x Award - as voted by Jules & Megs of piCture pOlish


To vote for ME, please head to the piCture pOlish Pinterest board HERE, and LIKE my mani.  As soon as I have the direct link, I will update this post.


So, now the official stuff, which is just as important.   Obviously, these 3 polishes were sent to me for review.  You can find out everything you need to know about piCture pOlish on these links -   ShippingNetwork and Everyday Deals pages    - and you can also follow them on the social media links below.  [Network is the important one, it tells you where you can buy].


     On-line Store   Facebook     Twitter     Pinterest     Instagram    You Tube    Google +


Ok Crumpeteers, I love you - the rest is in your hands :) xx


Related Posts Plugin for WordPress, Blogger...
Blogging tips